I started thinking about Christmas early this year, specifically decorating for the holidays. Maybe because my grandson started talking about it in October and was begging to get that decorating process started as soon as we turned the calendar to November. Actually, my thoughts were more about whether I would or wouldn't decorate.
(This was my Victorian tree approximately 40 years ago.)
I have decorated a lot of trees in the past 60 years and the thought of pulling out all the trimmings this year, when I knew I would not be entertaining, seemed a little pointless.
But, then I had an idea of something I wanted to try and that got the ball rolling.
Many of my trees have been quite traditional.
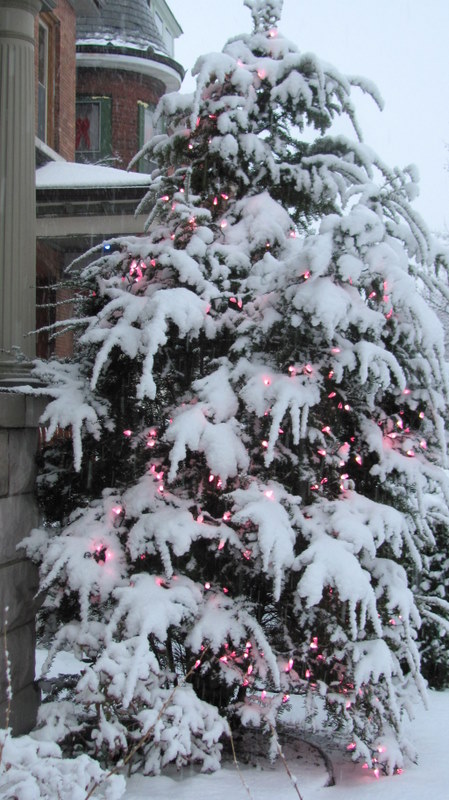
Here is one in the holiday colors of red and green. I opted for an angel rather than a star as the tree topper, and I did choose to set it up on the back porch. That location might seem a bit strange, but I am on a corner and have a sidewalk that leads from the side of the house up to the back porch. It is the entrance used by anyone who knows me. Plus, when the tree was lit, it served as "outdoor" decoration for the neighborhood,
Mother nature assisted with the actual outdoor decoration one year. (The evergreen eventually lost it's luster and had to be removed, so a repeat performance is not an option.)
At some point, I tired of the green tree and found a silver one at a going-out-of-business sale. This started a trend of picking one color to go with silver and sticking to the theme.
Each year meant buying some new ornaments in a different color, so I have acquired quite a collection.
One year I went for the mod look
I had a bright fuchsia ornaments in the mix but it seemed a bit much so I removed those and stuck with teal and lime.
I carried those same colors outdoors.
We had a lovely snow and it helped to make the colors stand out.
Black and gold might not be for everyone at Christmas time,
but color often depends on the wrapping paper that strikes my fancy.
Occasionally I go for a miniature tree and spend just as much time on it as I would a full size tree. Most of my time on this one was spent shopping the antique malls for ornaments.
Lighting for trees is often the trickiest part. In this case it also required constant monitoring.
This set of small trees I found at Gringo Jones one year. They came with the burlap, the base, and the star on the top.
All I had to do was add the jewelry.
Not all were that easy. One year I entered a contest for creating a Christmas decoration from recycled material.
Bedsprings were my inspiration.
The ornaments were made from folded paper, and wrist watch faces. Wrapped presents continued the theme.
Another "tree" that didn't fit the traditional theme was one using a dress form. I wrote a post about this one which you will find
here.
But my inspiration for this year was a grouping of lampshades that have been hanging in my garage waiting for their turn to "be something" other than a lampshade. Why not a shade tree?
The first step in making these into a tree was to establish a trunk. That turned out to be a threaded rod from the electrical department at Home Depot where they were nice enough to cut a 10' piece down to 7 1/2 feet.
My brother, John, created the base for me by cutting a piece of plywood into a circle and attaching metal tube that allowed me to drop the threaded rod into it for stability.
He also provided me with this piece that screws on the very top of the rod. This will be attached to a hook in the ceiling.

This shows the threaded rod inside the the metal tube. I stuck floral picks around it to fill the gap. However, the rod itself is not rigid, therefore attaching the very top to a hook in the ceiling will keep it from leaning.

I chose five shades of various sizes and sprayed them gold with any leftover paint I had on hand.

I spaced all five on the rod using nuts and washers to keep them in place.

That concludes the easy part.

I could not come up with a plan for stringing the lights. It was more of a,
jump in and see what works and what doesn't. And speaking of jumping, I will leap ahead and tell you that the cords take up a lot of room and are in the way of the hanging ornaments no matter how well thought out your plan might be.

This is 600 lights and a big crazy mess. I refused to rethink how I might have done this better and forged ahead with decorations.
Once again, I didn't have a plan and that was probably a good thing. What you think will look perfect on one part doesn't always work out that way. My method was to find something that looked good on a specific part of the tree and then find something that complemented it. If I tried something and didn't like it, I would move it to another part of the tree. I have to say that worked pretty well.
If you notice that the whole structure looks a little wonky, it's because I didn't have the nuts very tight in case I wanted to raise or lower them. My brother, Dan, stopped by one day and got them all nice and tight. One other issue with a shade tree is finding a spot to attach the ornaments so that they are not lined up with the rim of the shade. The balls are attached with fishing line, some of which is tied to a spot three shades up the line.
Because this will displayed on my second story balcony, I needed color that would show well from a distance. I chose to go with red and gold for that reason and because I already had some ornaments in those colors. I did buy the gold balls with the red jewels for the color impact and for the light reflection off the glittery surface.
Big Lots had this ornament and the one show above that were a bit on the gaudy side, but "stand-outs" were exactly what I was looking for.
I put this together in the room right off the balcony in hopes that getting it outside would not be too tricky. More on that later.
I hit one snag that did not make me happy. See the gold beads? The ones I thought I had more of than I could possibly use? Turns out I didn't have as many as I thought. No problem, just about anywhere that sells Christmas decorations will have these.
Well, not this year! Someone decided that this champagne color would be the new "gold." Believe me, I searched around and then caved and bought three strands of these. They looked closer to a match in the store so I was disappointed, but...I needed to keep moving on this project. (They do look like pearls in this photo. In reality they are not as "white gold" as they look here.)
I was a little worried about how this would survive being tipped over to make it out the door and onto the balcony. Turned out that was the slickest part. My brother, Dan, moved it for me and made it look easy. I had visions of the ornaments getting tangled up, but no issues! He also attached it to the hook in the ceiling with a piece of study wire to keep it from leaning. (Sorry, I didn't get a picture of the move.)
For the topper I bought the bundle of red balls early on along with some gold sprays. The gold sprays didn't really work so I went back for another bundle of the red balls and...they were sold out. So, I chose the red and gold poinsettias instead.
I bought a little remote switch so I don't have to go outside to turn the tree on
and off. Last year I didn't have that luxury. I had lights on the railing and having to plug and unplug them was a nuisance.
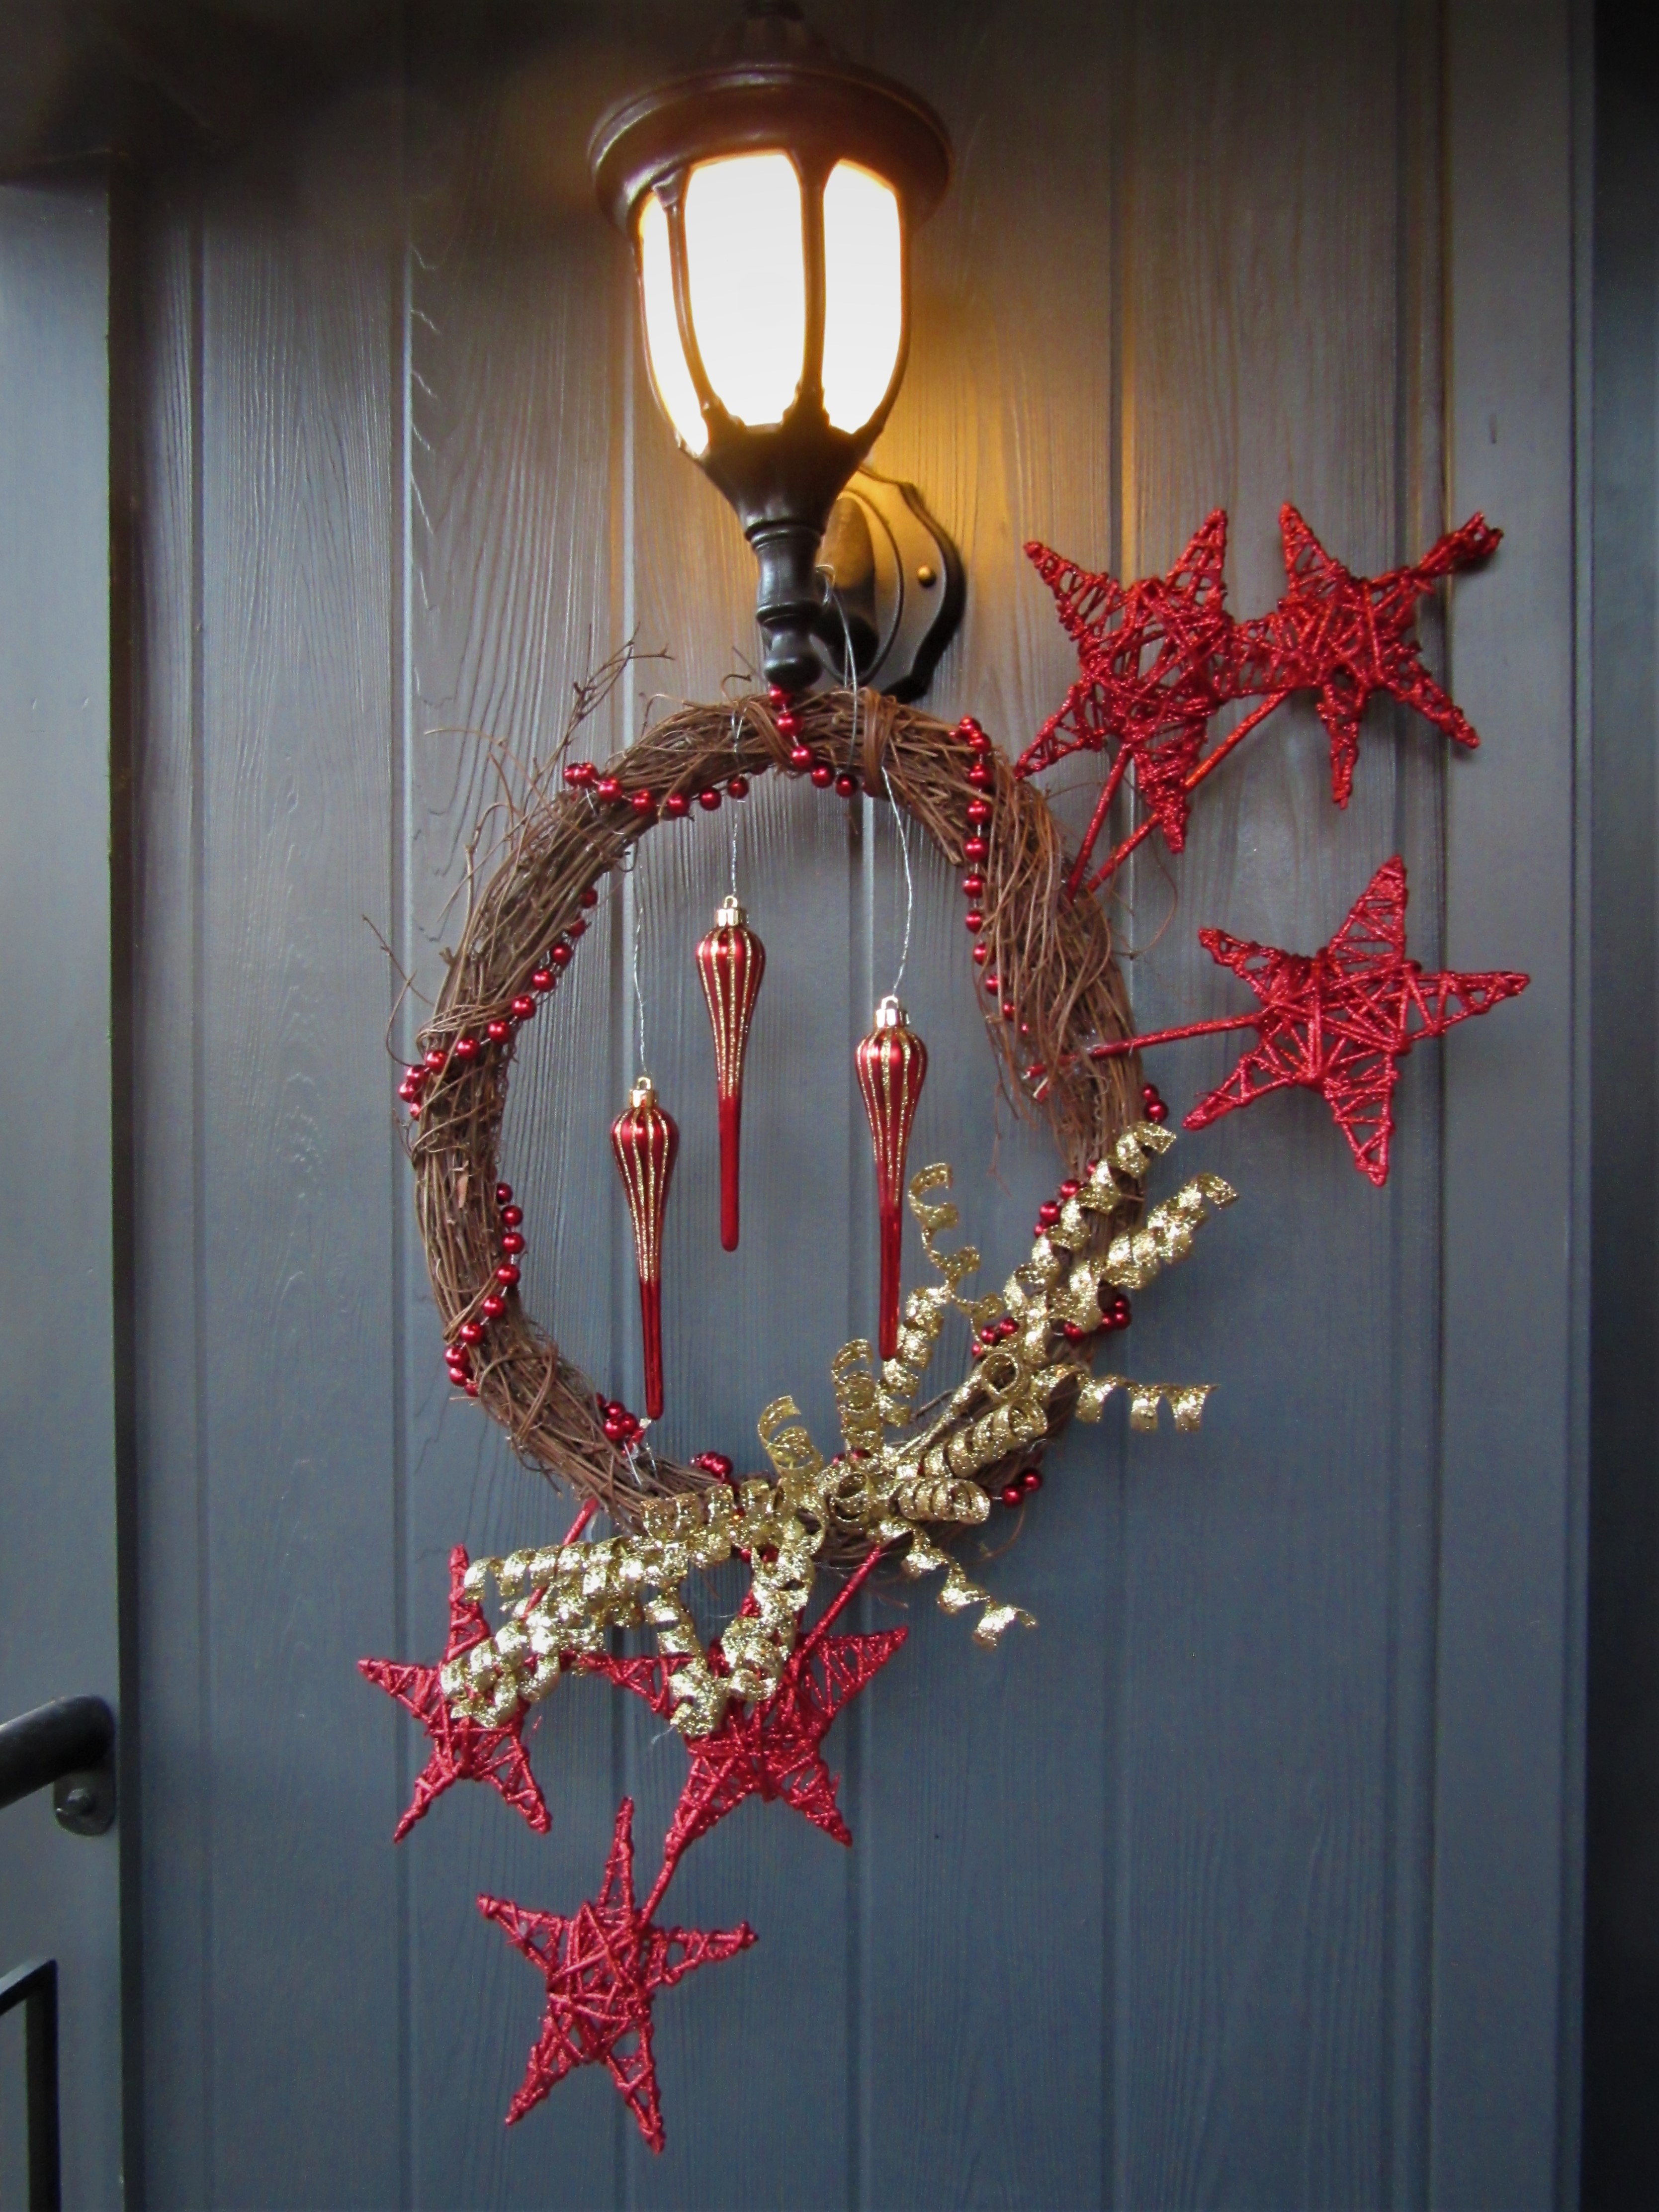
Those gold sprays I couldn't use on the tree worked fine for the wreath I made for the other side of the doors.
I also wrapped a few boxes to round out the vignette.
I had to check it out with the lights on at night. That's actually when it looks best as all the cords from the lights disappear.
Not up close, of course, but looking up from the sidewalk they are hidden by the glow from the lights.
As I have mentioned before, it is a bit challenging to get a picture of the balcony from the ground, especially with the electrical wire stretched across right smack in the middle of the shot.
My wrapped boxes may not hold up when the weather switches from Indian Summer to Winter, but I will deal with that as needed.
Merry Christmas from my house to yours.


Super cool!
ReplyDelete