In the past 45 years there have been enough to-do lists related to this house to fill a room from floor to nine and a half foot ceiling. Some projects have been repeated again, and again, and again, like three major kitchen remodels, complete bathroom remodels more than once, as well as a two story addition, a new studio/garage and complete redecorating of ten rooms over and over. But there is one thing that was old when I bought the house, and yet, it has never been touched. Why, you ask?
Two reasons: It looked good in spite of it's age and I liked it better than any replacement on the market. Season after season it stood in place doing the job it was meant to do. It was on the "list" and I kept an eye out for a good replacement, but it was still standing and I hadn't found one yet. This year, I asked my brother, Dan, to put in a few screws to buy a little more time. He made an attempt to extend it's life but his assessment was that it was pointless. And then it happened! On my way home from the grocery store, I spotted something that appealed to me.
Those two things started the ball rolling.
First the good-by photos.
My neighbors loved this rustic old fence too and even asked if they could have it to put on the other side of their yard. I think they doubted the soundness of that decision as they were taking the panels down and moving them across their lawn.
That part of the dismantle was swift and easy.
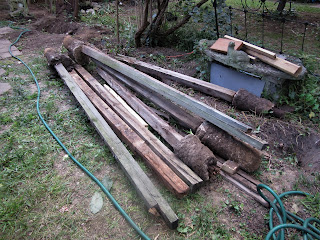
Removing the posts was another matter entirely. Brother John and his helper, Tony, took over that tough job.
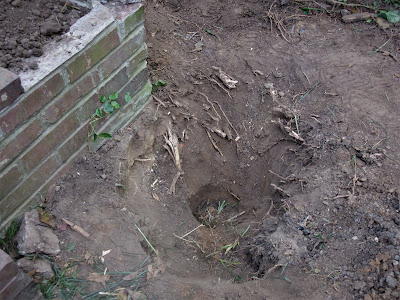
Tree roots were a major issue.
And for this one an even bigger issue.
It took some ingenuity and a fair amount of manpower to get the job done.
There were two posts that were not part of the fence but had been installed later to hold a decorative beam over the statue that you will see in some of the pictures. They had some massive footings as you can see here. Thankfully John disposed of all the posts and concrete for me.
After all the posts, big and small roots, and miles of ivy runners had been removed, I experienced for the first time what it would be like to have no fence. But, with minimal spacing between houses in the city, everyone has a fence.
Those patio blocks were in the area on the back side of the studio/garage. The plan is to replant them now that they have had a good cleaning.
This statue is extremely heavy but it had to be moved somehow.
The guys tried this method but that didn't work well. Plan B was to slid it onto a dolly and move it into the yard.
Tony gave it a thorough power washing and then came the difficult part of getting it to it's new location.
It could not be lifted into place so they put it back on the dolly and ran it up a ramp. I was too busy crossing my fingers to get a picture of that.
Not a great shot but it gives you a better idea of what they were up against. I think I will surround statue with ferns in the spring. This space gets minimal sun so flowers do not do well here.
She spent many years up against the old fence but I think the change will work out well.

Dan finished up another project and came to this one for the install. The new fence required some very specific measuring for the post holes. To eliminate any major mishap, Dan didn't take any risks and double checked the distance between posts, the depth off the holes and kept the level handy.
The fence panels slide into the grooves in the sides of the posts with little room to spare. If you look carefully you can see the guide line with the little level on it. This was one of those times when, "You can't be too careful." was the theme of the week.
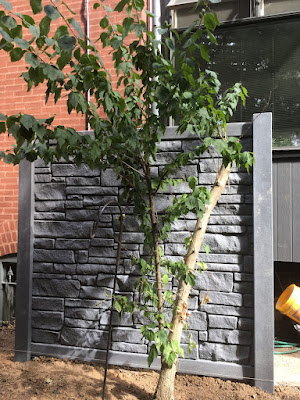
First panel in place! This picture is taken from my neighbor's yard as there is just a walkway between my porch and the fence.
Putting the panels in place is relatively easy if you have enough guys for the job.
Once the panels are raised high enough they just drop into place.
The one thing I didn't get pictures of was the setting of the posts. As I mentioned it required precision measuring, Once the hole was dug to the precise 30 inches and two bags of concrete were added around the post, it had to be quickly adjusted so that it was in alignment and perfectly straight.
This section required the cutting of one of the panels to fit.
From one panel Dan was able to cut this section and...
from the opposite side he cut the short piece needed here.
That left this short piece in middle as the only waste.
The final step was to cap the posts.
And then stand back and admire it.
I did find a few pictures that show the old fence in somewhat better condition. Not sure when this was taken but it was probably thirty years ago. Obviously it was already aged considerably by then.
This photo shows the fence in 1999 when I was preparing to to put in a new retaining wall. As you can see I had not started on my new studio/garage yet but that came shortly thereafter.
I have not forgotten about the patio blocks. They are being put back in place as I write this.
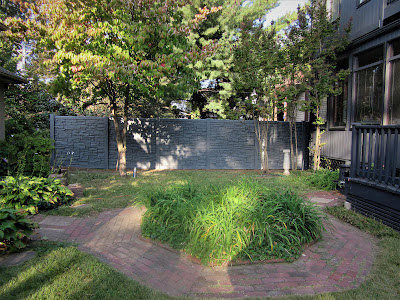
This is not very exciting for a final photo, but it will have to do until spring since it is now almost the end of October and the type of planting I want for this area will have to wait until then.
PS: Just had to add a couple more photos. It has only been a week since this post was published but the leaves have started to turn and I wanted to include these shots.


Can't wait to see the new fence in person. I think the old fence was probably the backdrop to many photos during my childhood!
ReplyDelete