I finally narrowed the island down to a home made recipe, the ingredients of which I talked about in this post. Now comes the part where we mix it all together and hope it comes out looking good.
 Dan and Ron took two sets of bed frames and turned them into a rectangular frame for the base of the island.
 Casters were purchased at Junque and are the perfect size for the base.
 Here is is upside down as Dan prepares to add the castors.
 The cutting, drilling and welding on these materials was not quick or easy.
 While they were working off site, I applied some stripper and then took the paint scraper to this board that was salvaged from the alley by my neighbor, Rich.
 Because the board was six inches too short for the length I had in mind, Dan suggested we slice it and add a piece in between.
 We then decided to bridge the gap with this piece of metal Ron had in his stash.
 I picked up some carriage bolts and sprayed the bright shiny silver with a gray primer. I added a little Autumn Brown tint to the edges and then used a toothbrush and black paint to flyspeck them.
 Now they look like they aged together.
 The shelf board got a coat of a charcoal color called Newsprint. I then rubbed some of it off with a wet cloth. Since the pink and green paint that was already on this board is not part of my color scheme, the idea is cover most of those colors with other paint.
 Here is a section of the board with more paint added in the colors of Cashmere, Revere Pewter, Amherst Gray and Classic Grey.
 These are all colors I had left over from other projects. I am writing this as I give those colors some drying time.
 Meanwhile Dan and Ron were building the drawers and figuring out how to connect all the various parts of this creation.
 Are these radiator panels not the coolest?
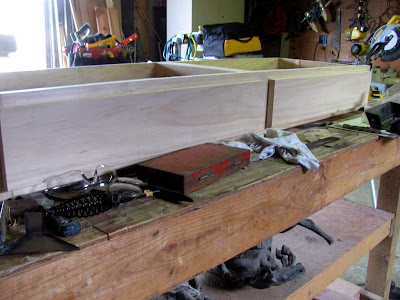 Two drawers that will fit directly below the counter top.
 Meanwhile I am making plans for the shelf.
 I had a stencil with a French address so I used parts of that on the board that will be the bottom shelf.
 I removed the letters from the plaque they were attached to and sprayed them with white primer.
 The next coat was old iron. It didn't look that "old" to me.
 So I added some bronze and some black. When that was dry I gave them a light sanding. Not quite there yet but getting closer.
 I added some stenciled details to the metal bed frames...
 Not knowing exactly what I wanted to do with the drawer box, I painted it a gray to match my other cabinets. I added more grays with a scrub brush, spray paint, dry brush etc.

Everything I did here was to make it look like the exterior wall of a old city building that had seen it's share of paint. I wasn't finished with it yet but the time came to bring it all inside.
 It could not be completely assembled in the garage because of the weight. Once the bottom section was in place, Dan and Ron carried it into the kitchen.
 Here they are attaching the frame that holds the drawers.
 Everything had to be secured before moving on to the next phase.
 It will roll on these casters. However, it has been decided that it needs to be bolted to the floor for safety reasons. Because the top extends beyond the base as an eating counter, there is the risk that weight on that side of the counter could cause the whole thing to flip. Heavy as it is, that is still a possibility.
 Here is Ron drilling through the bottom shelf to the basement. Problem solved and safety reigns.
 There is a metal support that extends beyond the drawers under the counter. That will help to support the top.
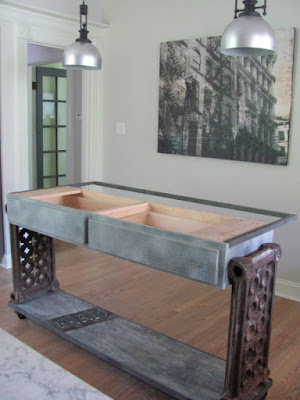 Here it is from the front.
So where are we on the top? Well, other than discussing how we are going to take about 2" off the long end and about 6" off the short end, nowhere. Actually, not true. We have determined that it would be best to take it in to be professionally cut. First of all, other than it's a faux stone top, we don't know what it's made of or what is the best blade to use when cutting it. So, as I write this, I am hoping that it will get cut in the next couple of days. (note: this turned into 14 days)
 As a refresher, I found my island counter in this pile. I will cut to the chase on everything in between this scene and this next picture.
 I don't want to relive it and you don't need to hear the sordid details.
 The view from the back door.
 Same perspective just a little higher up.
I spent many hours trying to come up with repurposed handles for the drawers. But because they will be used daily they also had to be something I wanted to grab time after time after time without cutting off a finger. I even went to plumbing supply and bought pipes and fittings, but I could only get 1/2" pipe and all together it was just too bulky and competed with the radiator panels.
I liked the simple long handles like these.
 However, they are considered appliance handles and run upwards of $85 apiece.
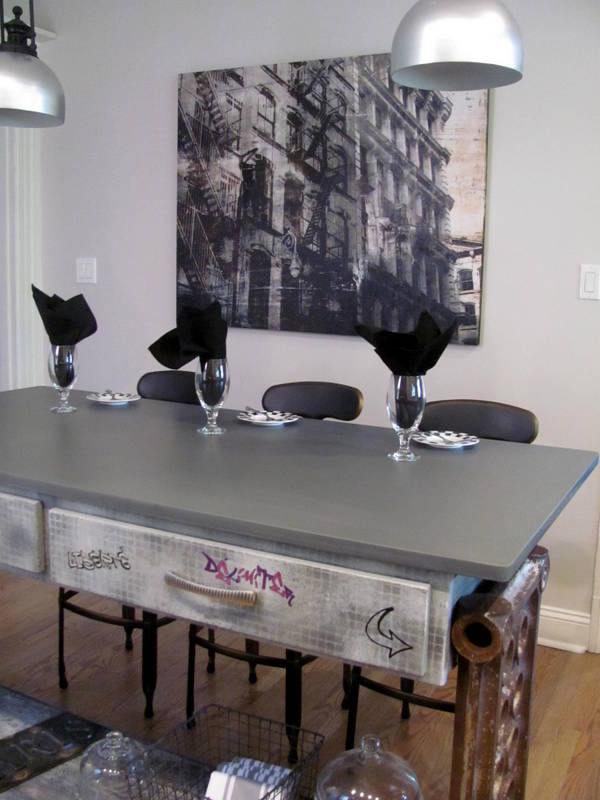
 I finally settled for a 7 inch pull which is the biggest size before it becomes "appliance size." Don't get me on my soapbox here. That whole concept is a rip off. But...moving on.
 I suppose I could have added the drawer pulls and called it complete but I didn't stop there.
 I added a little graffiti to authenticate my repurposed piece.
 It kept me busy while waiting for the top.


 I need to follow up on finishing touches but it is close to completion.
 Obviously, there are no stools yet.
Ah, so many to choose from and so few that fit the bill.
 Love the rose gold color of this one but it is bar height.

This one is adjustable and pretty cool looking but it was sold out and at a killer price too. Darn!


A stroke of luck! With some help from my son-in-law, Andy, we have located the sold out stool and it has been ordered.
I would have published this post yesterday but I got word from Fed Ex that my stools were on the way. They arrived today!


 In the background where there is that white glare....that's where the wall cabinets will rise off the counter up to the top of the window. That is the last piece of the puzzle.
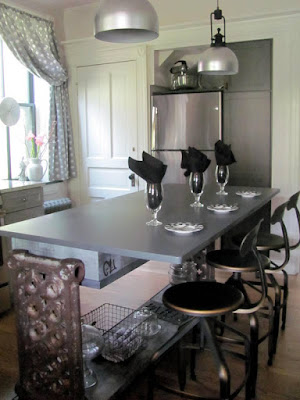 I had lunch today sitting at the island and it felt wonderful. It has been 18 weeks and 3 days since I have been able to do that.


Everything I did here was to make it look like the exterior wall of a old city building that had seen it's share of paint. I wasn't finished with it yet but the time came to bring it all inside.


So where are we on the top? Well, other than discussing how we are going to take about 2" off the long end and about 6" off the short end, nowhere. Actually, not true. We have determined that it would be best to take it in to be professionally cut. First of all, other than it's a faux stone top, we don't know what it's made of or what is the best blade to use when cutting it. So, as I write this, I am hoping that it will get cut in the next couple of days. (note: this turned into 14 days)


I spent many hours trying to come up with repurposed handles for the drawers. But because they will be used daily they also had to be something I wanted to grab time after time after time without cutting off a finger. I even went to plumbing supply and bought pipes and fittings, but I could only get 1/2" pipe and all together it was just too bulky and competed with the radiator panels.
I liked the simple long handles like these.


Another cool one.

This one has an adjustable seat but is a little over budget.
A stroke of luck! With some help from my son-in-law, Andy, we have located the sold out stool and it has been ordered.
I would have published this post yesterday but I got word from Fed Ex that my stools were on the way. They arrived today!

They are adjustable so the backs could come up a little higher but I have them set where they are comfortable for me.


Comments
Post a Comment