I have been sitting on this post for a really long time and there is still one thing left to finish but...I don't want to leave this hanging into the New Year so I'm publishing now even though there is still a wall that needs stencilling.
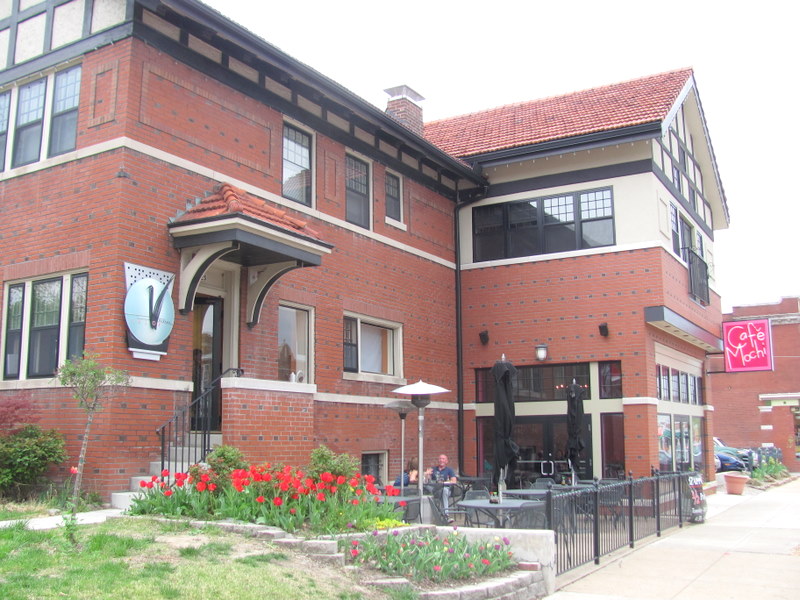
Back in April I showed some before pictures of the "soon-to-be" expanded restaurant called Cafe Mochi. As with any project this size, there are some surprises and delays along the way. Soon-to-be, turns into, when-the-hell are we going to be finished? But, I am happy to announce, we are nearing completion.
 The original restaurant occupied the new construction which was completed about two years ago.(the part of the building that extends from the back of the property out to the sidewalk.) Gaining additional seating required expanding into the first floor of the original structure and coverting about 3/4 of the first floor to more table space.
 This is where the stairs now break through from the restaurant into the older part of the building.


These two pictures show the space at the top of the stairs. The big window overlooks the front patio. This space now looks like this.
 The bench seat that was at the bottom of the stairs was expanded in the middle to fill this space. The window that was divided with a 9 pane window on one end is now one solid energy efficient window. Sunscreen shades are on order for this window as well.


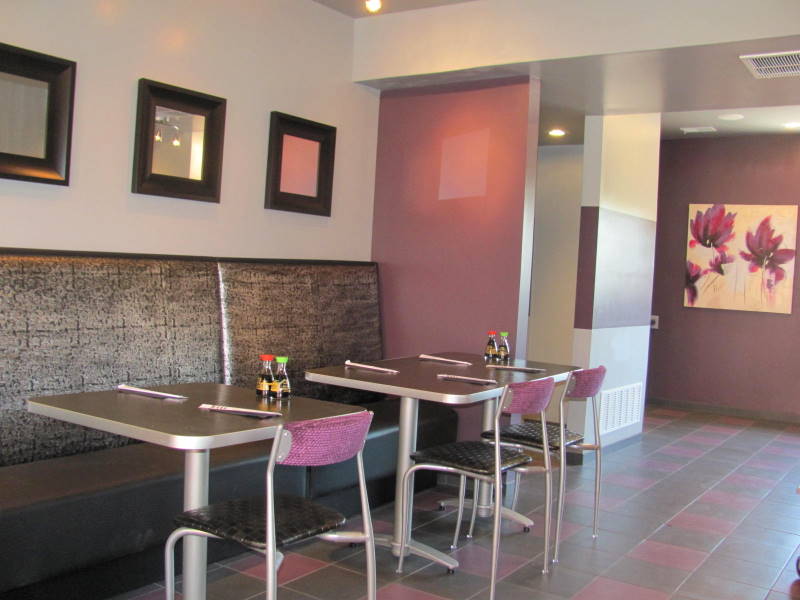
These pictures show one side of the west side of the room. The french door was replaced with one door and a sidelight. The long wall to the right of the door all the way to the soffit area was designated as a very long bench seating area.


 This shot shows how a box was built out to provide a private entrance to the restroom. The stairs are on the far side of this box. A wide stripe was painted on two sides of the box and continues on the inside back wall across the bathroom door.
 This corner of the room is to the left of what used to be the french doors. As I mentioned in the April post, a door to another room and a window on the back of the building were covered over.
 That section was also given a wall bench as well as a free standing table and chairs. (The back wall of this section will receive the stencil treatment.)

 The one spot not yet discussed is the wall opposite the bathroom. This was a tricky area to deal with because it is the only way to get from the top of the stairs to the back seating areas. By building the box around the restroom entrance we narrowed that space even more. To complicate it further, we needed to add a waiter's station on this wall.


And we now have a fully functioning addition just when colder weather is pushing the patio patrons inside for the Winter.
 This shot shows the grid pattern of the tile floor.
A bonus in annexing this space for the restaurant was that there was already an existing deck on the back that allowed for more dining al fresco.

Back in April I showed some before pictures of the "soon-to-be" expanded restaurant called Cafe Mochi. As with any project this size, there are some surprises and delays along the way. Soon-to-be, turns into, when-the-hell are we going to be finished? But, I am happy to announce, we are nearing completion.


The bench seat was moved upstairs. This area now accomodates the stairs and a round table.


These two pictures show the space at the top of the stairs. The big window overlooks the front patio. This space now looks like this.


These pictures show one side of the west side of the room. The french door was replaced with one door and a sidelight. The long wall to the right of the door all the way to the soffit area was designated as a very long bench seating area.

This area is now seating for 10-12 people. The short wall on the right of this shot was added. It forms one side of the little transition area that shields the bathroom entrance from the dining area.

The blue tarp covers the section of the wall that was removed for the new stairs. The white door is the entrance to the bathroom.

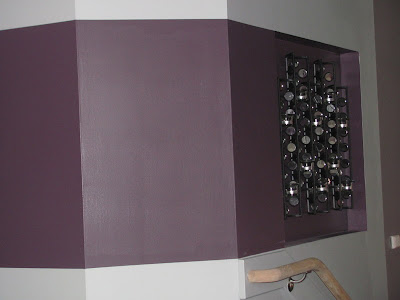
This picture shows how the stripe wraps around the box and extends over the stairway. A niche was built into the wall to accomodate the decorative wall decor.
Although not show here the rail on the stairway has now been stained plum to match the wall stripe.


The mirror and side sconces give that corner a little glitz.


Once the station and soda machine were in place, we still had to add an undercounter refrigerator. Then a glass shelf was customized to hold glasses and finally a mirror was cut to cover the wall from the shelf to the ceiling. A beautiful chandelier was hung over one end of the counter.

Miraculously everything fell into place.

And we now have a fully functioning addition just when colder weather is pushing the patio patrons inside for the Winter.

A bonus in annexing this space for the restaurant was that there was already an existing deck on the back that allowed for more dining al fresco.

The deck was stained charcoal.
Chairs, tables, and umbrellas were all that was needed for lovely garden dining.
Amazing. Even the wait station is beautiful.
ReplyDelete