Painting the vanity is my chance to put some personal expression into this new space. Because there are so many options when it comes to paint, it's often hard to narrow it down to one and stick with it. As you will see, I didn't exactly get it down to one finish. My inspiration started with, yes, a pin from my painted furniture board on Pinterest.

 Just forget you saw Cinderella above and let's move on with the step sister.
 Notice I didn't say ugly step sister because this piece is not ugly. It has some nice detail on the top that will be raised up slightly, the top will be removed, and the new quartz countertop will slide right under the scrolls.
 Would I have liked something a little French? You bet! But I am hoping that painted, this piece will have a different attitude. This top looks deep enough for a sink, right?
 Don't be fooled. The front is bowed and the top two drawers extend out past the bottom two drawers. It is only an illusion of adequate depth. A little notching will have to happen to accomodate the sink but I think it can be done without affecting the appearance of the piece. (my niece commented on the hardware saying, "crowns....well it is the throne room." That convinced me to keep the pulls.)
Although black, gray, and white are not my usual "go-to" colors, they are what I have chosen for this piece.

 I laid a candle on each drawer and pulled it from top to bottom. Then I brushed on a light coat of BM Classic Gray OC 23. (reads as white) I took a scrappy dry brush and drew it across the wet paint from top to bottom. Then after only a couple minutes of drying time I rubbed it lightly with sandpaper in the same direction.


I was pretty satisfied with each of the parts. I just wasn't sure how they would all come together. The top was being fabricated so I only had the small sample to judge how well that was working and we know how deceiving those small chips and samples can be.


I decided to distress the solid black just a little on the body of the piece.
 Then I moved on to the hardware. I had a can of dark gray primer from another project so I started with that. I tried one and thought it was ok.


FINALLY!!! Ok, maybe still a little premature but this post has to publish because there is nothing else ready either.
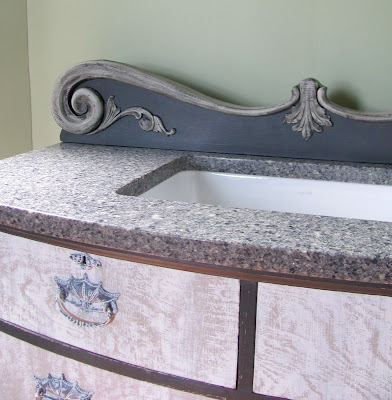
 That countertop I agonized over is finally fitted and on the vanity. (it's the perfect square sample at the top left.)
 That hole is, of course, for the faucet. For now this piece is sitting in the dining room so I'll have to give you the "in place" shot later.
 Fitting the sink into the vanity took more than a little notching as suggested earlier. In fact Dan practically started a sawdust fire as he burned up his blade.
 But the sink is in and ready for hook up. Turns out we had to raise the scrolled back piece to rest on top of the quartz. It could have worked either way but Dan and I decided this looked best. The best laid plans sometimes are not for the best result in the end.
I hope to divulge my plans for the mirror over the vanity in my next post.
I am linking to the following: No Minimalist Here
Funky Junk Interiors
Miss Mustard Seed

(Frenchgardenhouse.com)
It would have been nice to stumble across this piece at Goodwill, but it didn't happen. If you missed my last post, my piece looks like this.


Although black, gray, and white are not my usual "go-to" colors, they are what I have chosen for this piece.

After a light sanding, I painted it with two coats of BM Sandy Hook Gray HC108. At this point I knew I wanted to add white to the drawers but the rest was still a mystery.

I was happy with the results but now what?

I knew I was going to add Martin Senour Newsprint MST9B to this piece. I started with the insets on the sides. Rather than do them in a solid black, I brushed on a light coat and created a strie with the brush. I wasn't sure how this would look in the end but I knew I could paint it solid if it was just "too much."

I painted everything but the ornate back piece in Newsprint as well.

Now I had to decide what to do with the decorative piece. It had already been base coated in Sandy Hook and I knew I wanted part of it to be black. So I painted black over the whole thing and used a wet cloth to wipe some of it off.

I was pretty satisfied with each of the parts. I just wasn't sure how they would all come together. The top was being fabricated so I only had the small sample to judge how well that was working and we know how deceiving those small chips and samples can be.


I decided to distress the solid black just a little on the body of the piece.


Like I said, ok. But I decided to try something else as you can see on the top right.

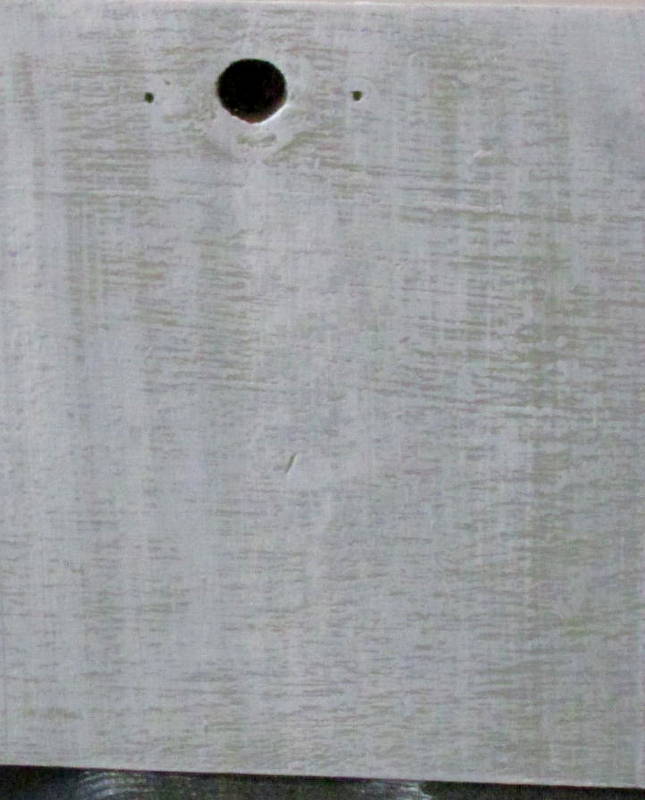
I painted over one piece of hardware with the Classic Gray.

Then I stuck it under the faucet and let a slow stream of water wash away the white until I had this.

Both had their merits but I finally chose the white because it blended with the drawers and....let's face it...I already had some stuff going on with this piece.
This is it until the countertop is completed. I'll hold this post until I can show the end result. Besides, I may have to make some adjustsments.
_____________________________FINALLY!!! Ok, maybe still a little premature but this post has to publish because there is nothing else ready either.


I hope to divulge my plans for the mirror over the vanity in my next post.
I am linking to the following: No Minimalist Here
Funky Junk Interiors
Miss Mustard Seed
This turned out beautiful - a one of a kind piece, love it!
ReplyDeleteYour newest follower - would love to have you visit and follow back:)
Visiting from No Minimalist Here
Love it...I'm going to show my husband and tell him "see? dressers are supposed to be vanities" :)
ReplyDeleteYour newest follower.
what a transformation...fabulous... xv
ReplyDelete