To eliminate any doubt, I decided to label this new bathroom.
 I found this stencil online at Maison Stencils. Because they custom size, I asked them to make me one twice as big as the size that is offered.
 Next my brother built the transom frame. (Sorry, I completely forgot to take photos of the process) Anyway, not as easy as it sounds....lots of math and lots of opportunity for error.
But it turned out great. We debated whether to stencil the glass before sandwiching it into the frame or after. We weighed the pros and cons and finally decided it was a toss up. The toss came up after so I painted both sides of the transom with primer and two coats of paint after the glass was installed. Did I mention that one side of the transom is white and the other side cream? Although my brother marked the top as L and R, I somehow ignored that and painted layer after layer. Yes, my 50/50 chance of getting it right by accident failed. I had put the colors on the wrong sides. But rather than have me redo it, Dan shaved a little off the edges and made it fit. Whew!
 Now I was ready to place the stencil. I had more trouble getting this darn thing centered than I should have. After lots of measuring and adding and dividing of fractions it was still off. Only then did I realize the outside edge of the mylar was not straight and COULD NOT be used as a guide. SO, begin again! Finally, I thought I had it. Marks showed the center of the glass from left to right and top to bottom. I placed similar marks on the stencil. All I had to do was line them up after I sprayed the back with spray adhesive. (well actually the front because I was stencilling the back of the glass therefore I had to lay the stencil face down.) I'm not a dummy but I was starting to feel like one as I repeatedly checked what was top and which side was white and which was cream. It was a little crazy but it got a whole lot worse.
Pictures? PICTURES! For future reference: As the stress level rises the photography diminishes.
 I taped one side of the stencil in place, Dan held it up and I sprayed it with adhesive and we laid it back in place. Then all parts of the frame had to be covered to protect them from overspray. (Yes, that lovely protection is junk mail I pulled from the trash.)
I was using spray for this stencil....not my usual method but I planned to frost the glass to make my stencil.
 I took precautions to protect my cabinets and still they had overspray in impossible places. So maybe that explains why I also had some cleaning up to do on the glass itself. I think I'll just mention that it's not perfect and let it go at that.
 I thought about scraping it all off with a razor blade and starting over until my brother mentioned that the second time might turn out worse than the first. So it is what it is, finished.
 The door below the transom is frosted too... for privacy. It is done in stripes and OMG, no, I didn't do it. I bought it that way and trust me there is a significant upcharge for the stripes. Clearly, I get that now.

 For those who saw the door reflected in a mirror on a previous post, yes, we now have a handle with a lock on the door. But, no window treatment just yet, so the guest bath is still not ready for guests.
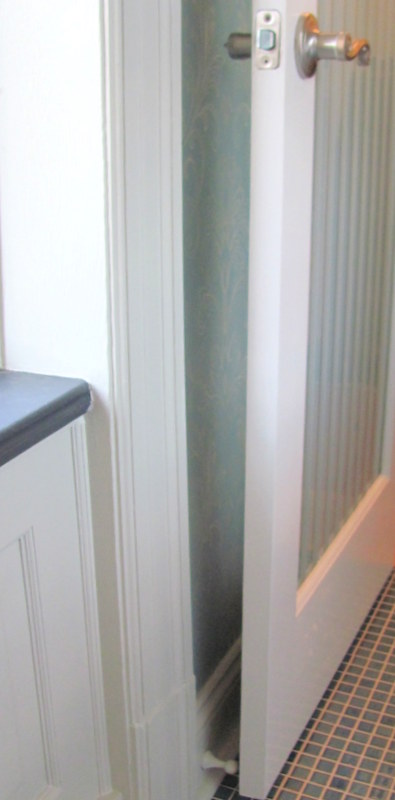
 Another little but important feature is the door stop. My brother devised this cute little stop when I nixed the modern options available.


I got so caught up in the process that I forgot about taking pictures. The two parts above were once one. Dan took them apart, added a double ended screw and attached it to the baseboard.
 I added the paint for a unique doorstop that protects my wallpaper from being damaged by the door handle. Just another one of the many details involved in remodel.
 And, I might add, justification for all the crap I save because it might come in handy some day.
I am linking to: Creative Me Linky Party


But it turned out great. We debated whether to stencil the glass before sandwiching it into the frame or after. We weighed the pros and cons and finally decided it was a toss up. The toss came up after so I painted both sides of the transom with primer and two coats of paint after the glass was installed. Did I mention that one side of the transom is white and the other side cream? Although my brother marked the top as L and R, I somehow ignored that and painted layer after layer. Yes, my 50/50 chance of getting it right by accident failed. I had put the colors on the wrong sides. But rather than have me redo it, Dan shaved a little off the edges and made it fit. Whew!

Pictures? PICTURES! For future reference: As the stress level rises the photography diminishes.

I was using spray for this stencil....not my usual method but I planned to frost the glass to make my stencil.


This is a small room so photographing it is a bit of a challenge. But then, why should that be any different than the rest of this project. Challenges abound in a remodel of a 110 year old home.


I got so caught up in the process that I forgot about taking pictures. The two parts above were once one. Dan took them apart, added a double ended screw and attached it to the baseboard.

I am linking to: Creative Me Linky Party
Comments
Post a Comment