Things are progressing in the pantry area but not quickly enough for this post. So, I'm taking you back to the dining room for a little update.
 Last Saturday I found four antique curtain rods at a like minded friend's yard sale. (we recently perused each other's stuff and then traded a folding screen, about 120 bed springs, and some very old knotted string hanging baskets for a dress form mounted on a brass stand and covered in lace, and several silver teapots and pitchers.) We do admire the same stuff so it makes sense to trade with each other. But, I digress... I realized these rods did not have mounting brackets but......
 ....I did! I was sure I did, although I had not seen them in a while. But, yes indeed, I did find them. Score one more for the hoarder.
 Small problem: The holes in the brackets were slightly smaller than the rod that is meant to slide through them. But my brother saved the day.

 making the holes slightly larger and the peg slightly smaller. It was work but it worked. The rod needed a little paint repair after it had been shaved.
Next the brackets had to be painted to match the rods. If you noticed in the picture above, they are silver.

 Then came a little green and red with some rub on gold. Truthfully I lost track of the process. I was dabbin' and sprayin' and working them over. In the end they turned out pretty close to the rods.
 I don't think anyone will know they were not an original set.

That was hurdle #2. Hurdle #3 was attaching the bracket to the wall. Plaster walls don't hold up well under the weight of yards of fabric and I did not want to attach the rods to the woodwork. So, again Dan was called in to fix the problem. He cut wooden plaques to put behind the brackets.

 So the next step was to paint the back plates to go with the rods. I won't give you the blow by blow because I didn't document it, but it was similar to the painting of the brackets.
 I textured them a little first so that I could use a couple colors to create depth. I really wanted to make them disappear and thought about painting them the wall color but they really weren't going to disappear no matter what I did to them. So, I thought it might just be better to treat them as part of the rod system. After all, they were a necessary part.


 I bought small rings with clips to hold the drapery fabric. Yay! Something that works perfectly, is the right color, and comes in identical multiples. No modifications or assembly required.
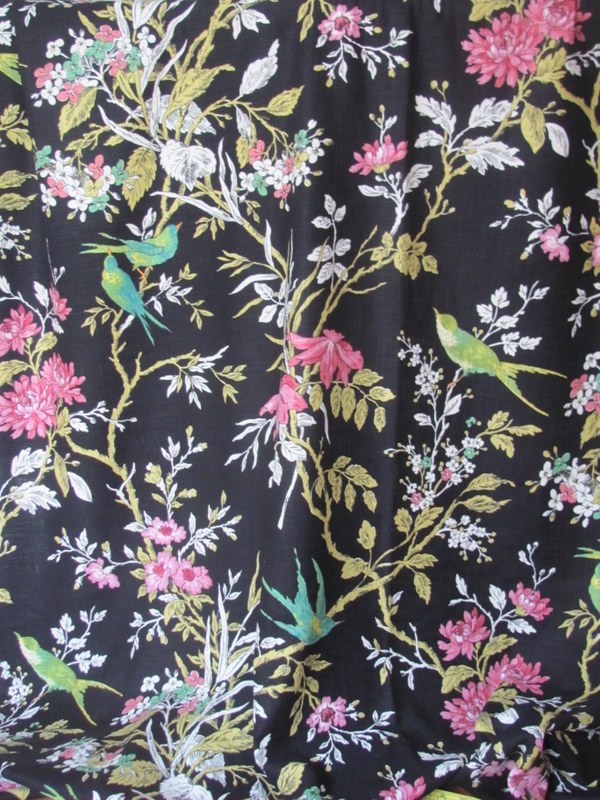
 Next came the job of turning this fabric into drapes.


 I realize this is a lousy photo and I'm frustrated that I don't have something better to end this post. This bay end of the room is really lovely. A fireplace flanked by windows shows this fabric off beautifully. For now you are going to have to take my word for it. I am working on a way to capture the true essence of the room.


 Let me just say it has added drama and brought more life to certain aspects of the room. On the other hand it has caused me to rethink one of the fabrics I had planned for the dining chairs. That's ok, because when a room starts talking back, that's when you know it has developed personality.


Oops! No need to worry. I have six and only need four for this project. Obviously he could not make these holes as large as they needed to be so he split the difference by...

Next the brackets had to be painted to match the rods. If you noticed in the picture above, they are silver.

First I sprayed them an antique bronze. Then I added a very light spritz of black.


That was hurdle #2. Hurdle #3 was attaching the bracket to the wall. Plaster walls don't hold up well under the weight of yards of fabric and I did not want to attach the rods to the woodwork. So, again Dan was called in to fix the problem. He cut wooden plaques to put behind the brackets.

There is considerable compromise involved in projects like this and although this is not ideal, it beat out the alternatives.


Installation of all these parts was a little tricky. Dan spent hours and took extra precautions to make sure these rods would perform well. I could give you the details but I really hope no one out there needs to know this.

Not the showiest picture but, there they are setting up for 24 hours before I hang anything on them.


Right now there is not one flat surface in this house that isn't piled with stuff including a lot of dust. Because I have a wide second story hallway, I chose it as my cutting table. A quick swish of the dust mop and I was in business. I arranged it so my cutting line was even with the stairs. That allowed me a place to kneel.

Each panel is 111 inches long. It was all simple straight sewing but it went on and on and ...not really all that bad...just being a martyr. I had to hang each panel to measure the hem line. 110 year old floors rise and fall slightly in odd places so the hems needed to be pinned and hemmed accordingly. (FYI: The color showing on my monitor is NOT the true color of the walls. It's green but not that springy.)


In the meantime this will have to suffice.

I added something to the design of the room yesterday that was never in the plan. I'll post about it in a few days.

Beautiful!
ReplyDeleteWhat an amazing combination of fabric and paint! The colors are luscious! Such creative problem solving with the rods and brackets and attachment to the wall. Applause to your skilled craftsman and your artistry as well! The room will undoubtedly be inviting and irresistable!
ReplyDelete