This post covers the small details that have kept the powder room inches away from completion. Finally, at 99.9% there, I am calling it finished. I have a couple spots that, in my mind, still need a little something, but I am keeping an eye out for the element that adds charm instead of just filling the space.
Detail #1
The mini-blind arrived for the powder room and has been installed.
 Because this window is at eye level when standing on the deck, this was a pretty essential part of having a working bathroom.
 I found a fabric that seemed perfect for a valance. It adds a softness to the blind you see reflected in the mirror.
 I made a simple fake roman shade and stapled it to a small board. That board is screwed to the top of the window frame.

Detail #2
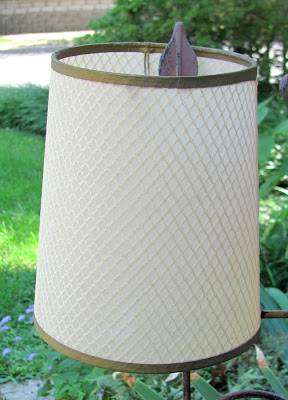 I had a small lamp I planned to use on the corner of the vanity but I did not like the color of the shade in that room.
 So I wiped it down with an ultramarine glaze by Sinkeloid. I have had this product for probably 15 years and I love it, but it is no longer available. I bought all Brod Dugan had when they put it on clearance so I'm stocked up. A few of the cans have rusted and I had to transfer the glaze to pickle jars but I will do what it takes to preserve what I have.
 The top and bottom rim were trimmed in a brown paper. I used the Sharpie paint pen to make the trim black.
 I experimented with a few colors on the lamp base but I was not impressed. This is the orginal color you see here. I didn't photograph my discarded ideas.


 I was hoping to put it on the top of this stand that I purchased at a yard sale. It is meant for a candle and has the little spike in the top to hold the candle in place. My brother cut off the spike and then proceeded to work on the base of the statue.
 With a couple precision whacks of the hammer he broke away the base.
 Then he shortened the pegs that protruded from the bottom. Our plan was to mount this on something that would look and fit better on the stand.
 That something would be this rock that I have had for years.
 Dan turned it over and drilled two holds a little larger than the pegs.
 I'm making this sound like a five minute operation. Not quite! It was a little more involved but I'm skipping over a few of the details. We had to fill the holes with epoxy, stick the pegs on the statue into the holes, and then brace it in a straight upright position while the epoxy dried. Then Dan added a thin flat board that he cut in a circle to the inside of the candle holder. We needed to attach the rock to the stand and since the top of the stand was cupped this was a bit of a challenge. Then the wooden circle had to be screwed to the metal stand. This explanation is clear as mud but I'm not going for a tutorial here. Just making my point that it was a bit of a process getting from purchasing the statue to....

Detail #1
The mini-blind arrived for the powder room and has been installed.


Even by standing in the sink I can't get far enough away to get a decent picture of this treatment.
Detail #2


I finally opted to prime the entire base.

Then I drybrushed the raised areas with metallic silver.

If you look closely you will see the mirror behind the lampshade has something hanging on it.
I thought it needed a little something extra so I hung a multi strand silver chain from side to side.

I am slipping this shot in here to show you how nicely the wallpaper reflects in the mirrors making wallpaper on this wall unnecessary.
Detail #3
I spotted this statue in a new shop that opened on antique row. I believe it to be Buddha, but if someone knows otherwise, please let me know. I liked the shape, the color, and the texture and I thought it would be perfect in the new half bath.

The part I didn't like so much was the base.


Here!
Speaking of process...if you are interested and have not been following the new powder room blow by blow...it starts HERE.
Comments
Post a Comment