It has been awhile since I posted anything new. I have good reasons...none of which you really want to hear...so let's get back to business. I'm easing back into blogging with a post that was inspired by my many hours perusing pinterest recently.

I saw this on my DIY board and thought, with my limited energy this might be something I could manage.

 Paint brushes are a staple for me, so no problem there.


 I jumped back and forth on these but I think this is the first one I completed. I love the combination of paint colors on the handle, and kept this one simple for that reason.
 Because of the blue handle, I chose an earring and a broach with blues stones. Once those were attached, I searched my ribbon bin. I'm not a big fan of blue so I knew I would have very limited choices. Turns out I had this one with the gold stars. Luckily it was perfect!
 Although this one has a beautiful paint patina on the handle, it does not show up well in the photo. I wrapped the base of the handle in the same ribbon used in the bow. Then I ran two rows of pale gray rick rack along the edges before I attached the lovely pink and silver broach. I should really try for a clearer photograph on this one. If you have eagle eyes you can see tiny bits of pink in the paint.
 I cut the green polka dot ribbon for another brush and then decided not to use it on that one. I don't like to waste anything, so I stuck it on this one along with a band of black rick rack and a little rubber posy. Looks like I used this brush for a striae. I may have to pull it off the "decorated" shelf if I need such a brush again.
 I thought this would make a nice shot of this brush but it's not so easy to see what I did to this one.
 Easy enough to tell here that I wrapped a bit of the handle with twine. Then I added a band of sparkly trim and a band of black trim that has small beaded half loops hanging from the band. Another piece of twine holds the rhinestone star in place. (One of my Colorado grand nieces in the photo. Her mom is the star when it comes to photography.)
 This is one of my favorites. Muslin knotted bow through the handle, a row of white trim over the metal band, some small pearls attached to the trim, and a small broach glued between the two make this one a nice mix of elegant and everyday materials. The broach is a combination of ruby, turquoise and pearl beads in an aged gold setting.
 I took several pictures of this one but...
 I'll stop at three.
 Layers of beautiful paint colors on this brush. Even the bristles are tinged with pink. This one I call The Flapper.
 I played with the special effects on this one.
 The broach and coffee filters are something I had used previously on a wreath. I'm all about recycling so, of course, I had it back in cache. I added a gold bracelet to the handle to accentuate the gold beaded circle on the broach. It doesn't get any easier than this.
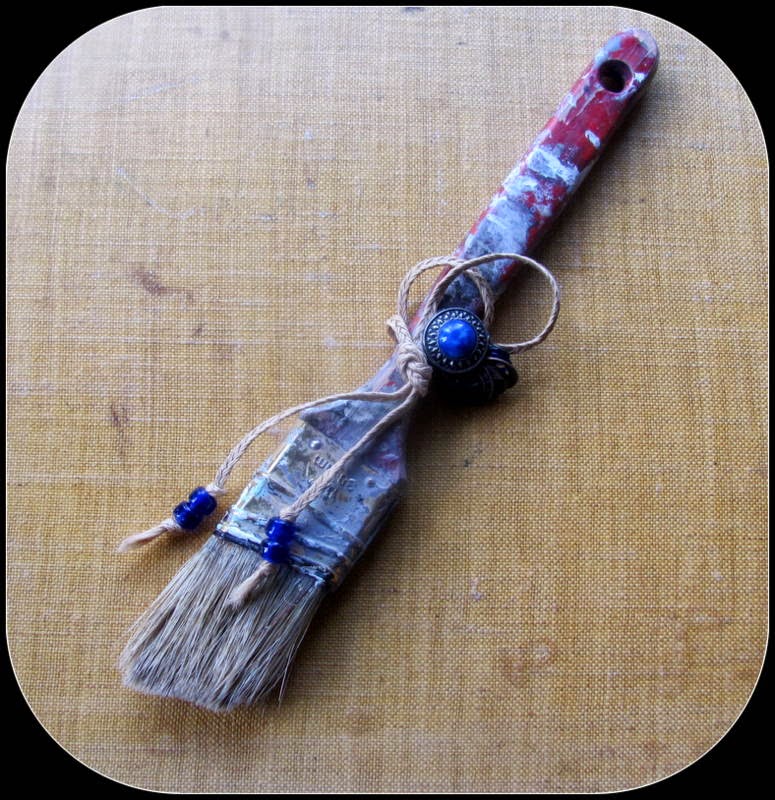 Another one with a lovely mix of paints, this time on a red handle. I kept this one very simple with just a blue earring and a few blue beads on twine.
 This shot shows the silver and blue rings that are gathered on the scoop of the earring. I think this one has a bit of a Southwest flair.
 This is the last one I completed. The handle is a pearly white and is mottled with a pale gray paint. In my eyes it works well with the flower on the broach. (Not so well in the picture) The pearls are attached to the flower as one piece of jewelry. Again, just one of those that does not read as well on the screen, but one of my favorites.

 So, there you have it. Ten mini projects. Maybe that's a sign that all 10 toes are back in the water.
(dianafrey.blogspot.ca)
One stipulation for any current project is that I must have the materials on hand.
They also needed to be well used, or abused, depending on how you think about paint brushes.
The next step was to gather glue, scissors, old jewelry, ribbon, and anything that might lend itself to this task.
A brief period of playing with the possibilities and I was finally into a new mini project.
Comments
Post a Comment