Back to the beginning to refresh your memory on what this window looked like when we started. The sink and counter top cut off the bottom part of the window and there was a well behind that small splash along the back of the counter top.
From the porch side it looked like this. I tried putting things in the well that were decorative, well sort of. Truth is, nothing really looked very good.
Like everything else, this had to go too.
The idea was to create something that resembles this. The farmhouse sink got nixed way back when and my back splash had to be higher and my windows shorter. So, in reality it doesn't look like this at all. But this is where we started.
Dan had taken these doors off a china cabinet and they were the right width for my window, so we decided to use them. The glass has been removed in this photo but they do have nice beveled glass inserts.
This was the mock up before the tear out.
All parts of the window were removed. The only thing we saved was the casing and corner blocks.
Then the rebuilding started. The window sill was raised considerably for a couple reasons which will be obvious as we move along.
Even at that height the doors still do not reach the top. However, Dan had a plan to fill the gap.
I painted the windows a charcoal color called French Beret.
Most of the fitting of these windows was done from the porch side. That meant the storm window had to be removed.
So there were several days when a little cardboard was all there was to keep the AC inside.
There were some pretty long discussions about what to do with the bottom panel on the porch side. Ideally we needed to be able to access the pipes to the sink. Over breakfast with my friend, Vicki, I mentioned this unresolved issue and she said she had something that might work. I followed her home and picked up this piece.
It was pretty much ideal! OK. OK not quite this perfect. The guys built this frame
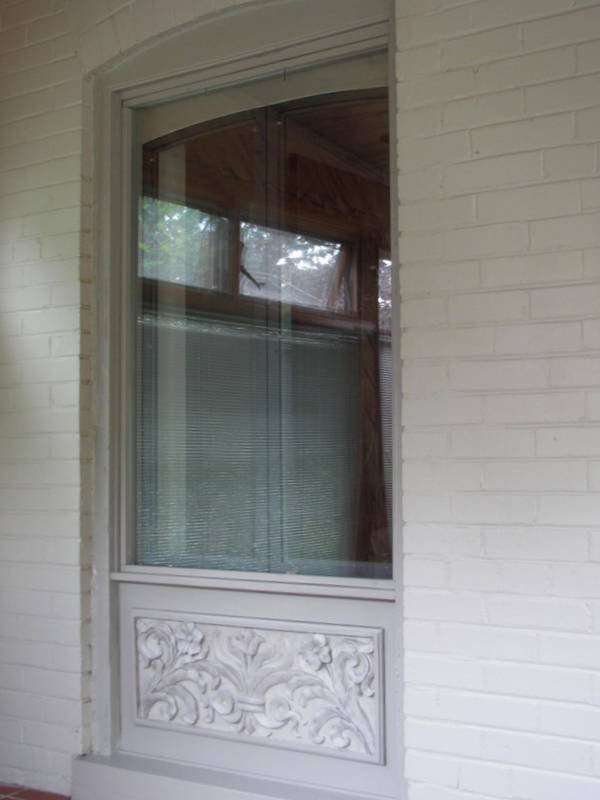
after I got this plaque from Vicki.
The color was a little off for my scheme but that was no biggie.
I doctored that up a little.
And we were in business. (sorry about the reflection. Impossible to avoid)
From the inside it looks like this. That cross bar you see is actually the transom bar on the large windows of the porch..
I originally thought I wanted the small piece above the windows to be black.
However, the arch detail at the top of the windows was lost in the shadow so I repainted it to match the rest of the window trim.
Keep in mind, there are still overhead cabinets to go on either side of the sink.
As of yesterday I have knobs on the doors and drawers of the cabinets and that made working in this kitchen way easier.
This hardware came from my old butler's pantry and is original to the house.
The knobs were recycled from the previous white cabinets that were moved to the basement. I'll find other hardware for those.
This wire holder was a gift from my niece. It fits nicely here even when the door is open. What I will put in it remains to be seen.
I did add the knobs at the top. I had purchased these from Hobby Lobby long ago thinking I would find a place for them someday. Seems like
someday is getting closer for a lot of things. Can't wait to reveal the next post. Hint: The island is almost complete.


French Beret! I knew it! What a clever solution and so much more unique to your design! I love it!
ReplyDelete