
Details and Accessories

I'm just in the beginning stages of accessorizing the kitchen.  It's difficult for me to pick a day, shop for accessories, and call it finished.  The places I shop require repeat visits over several months before the right thing lands in my hands.  So the first thing I do is case every room in the house, basement and garage included, for things that could enjoy a new life in a new space.  Those things become the placeholders for something that I find later and like better.  That thing might pop up at a yard sale, a thrift shop, or even someone else's trash.  The second thing I do is head for Arhaus.  Yes, you read that right, the awesome furniture store with pretty expensive stuff.  Surprised?  Don't be.  I go there for inspiration.  I look at how they layer, the juxtaposition of unrelated items, the grouping of patterns and all those decorating nuances that make their displays so special.  I especially take note of what is "not-for sale."  A lot of what lines their bookcases, the way they paint the walls in each vignette, and their table displays have ideas that are free to be copied.

For example:  This is one I saw this week and knew would make a nice little accessory for my kitchen.

 I did not take a picture of their idea because I knew I had what I needed...light bulbs and hot glue. 

They arranged their bulbs in a circle and layered them.

And, voila, you have a sparkly re-purposed industrial flower.

I'm checking out the best place to put my Arhaus copycat.

A while back I posted another Arhaus item that I didn't know existed until I saw it in their ad after I had finished mine.  Guess if you hang out there enough you absorb more than you think.  Interested in what it was?  Check here.

I'm not super great on the computer but I am getting a lot better about finding things there vs chasing from store to store.  One thing I need is a rug in front of the sink.  I thought I had found the runner I wanted at One Kings Lane in a rosy pink and gray.  It was PEFECT!  Well, almost perfect. (I would show you a picture but it's no longer on their site.) Remember the whole scenario with finding a dishwasher with a door that did not take up more than 29" when open?  Well, same issue came into play here.  The space in front of the dishwasher is still 29" and this perfect runner was 30" wide.

So for now, I'm getting by with this shorty until I find something closer to the one that made my heart happy. (I want one about 7' long.)

One item I didn't feel like waiting for was a lamp for the sill over the sink.  I saw this one at Home Goods and knew it would be fine.

I was not crazy about the color of the shade but that was fixable.


 The slightly off-white shade was okay, but next to the trim color of the window, it was a little boring.

I did try a stencil on one side but ended up painting over it with the stainless steel spray.  In this case simple was just better.

Another area that needed some work was the shelf that runs the full length of the wall over the two doorways and the refrigerator and pantry cabinet.

Not easy to see in this picture but the shelf molding rests on the door casings.  There is about a 14" gap from the top of the shelf to the ceiling.

Something I had on had was a pile of Readers Digest books.  I bought them here and there for another one of those copycat projects that never happened.  I'm sure you have all seen individual letters of the alphabet cut from one of these books.  I was prepared to do the entire alphabet but my enthusiasm faded after I discussed it with my brother and realized there was more involved than I was equipped to handle.  Secondly, I really did not have any good reason to make them other than to say I did.

So why not paint them various shades of gray and use them in the kitchen.


Here is the panoramic view.  The tray in the middle is one of those placeholders.  I have had this for ages and liked the size of it for this display.  However, when I took the back off I realized the dollies had been laid on the back of the glass and painted over.  Yuck!  I had plans to put an old piece of sheet music behind the glass.  Not to worry as I can cut another piece of glass to fit and move forward with my plan....just not today.


I added a little stencil to some and glued some label type paper cutouts to others.

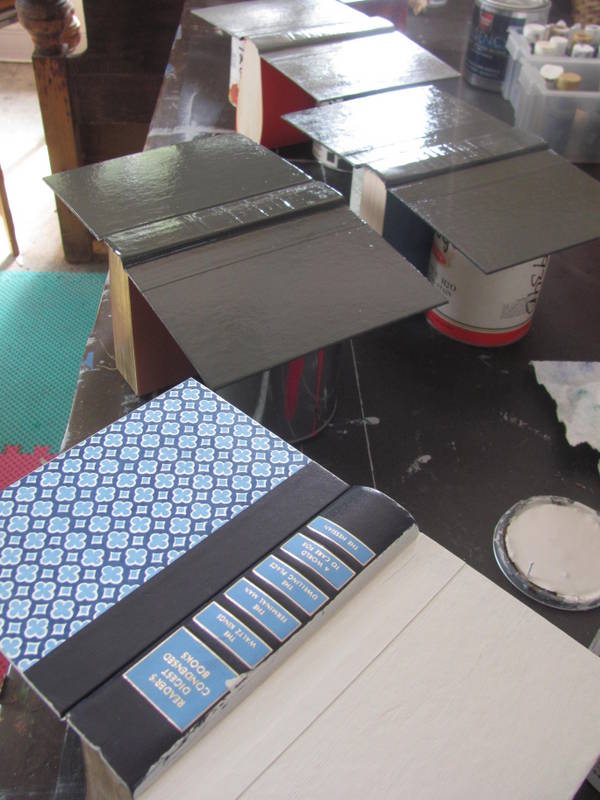
I had some folded book pages I had experimented with a few years ago so I added those to the mix.  Hey, Arhaus is still doing it, so it's still good in my book.  =)


A few things will change here, but this takes care of it for now.

This window cannot have much of a window treatment so...

I used the bulk of the fabric on this one.


 The wire rack was a gift from my niece.  I'm sure the contents will rotate periodically.


 The canvas in the background was a Home Goods find back when the kitchen remodel was about to begin.


 The mixer is old but works great.  I saw it at a neighbor's yard sale and she told me I could have it. Part of what makes this a nice vignette is the interesting drywall work Dan did to create more space while working around the stairs that pass over this area.


Another detail that makes me happy is the back plate from my brother, John's, stash.  I had the doorknob and added the numeral for fun.


I had completely forgotten about these dried minature rosebuds that were stuck in a jar in the garage.

This is why it's hard to get rid of certain things.


I know I'll regret it down the road when it would be just what I need.


 I reused the old knobs from the previous cabinets because I didn't find anything I like better.


 I did not realize how much I would love solid surface counter tops.  I have always had laminate tops and liked them at the time, but I really love my Rococo from Viatera.


 I thought it would be nice to post a shot with the windows open.

 My hydrangea bushes were a little stingy with the blooms this year, but when I needed them, they gave me just enough for a small bouquet.

 As you can see, I still struggle with the lighting in my photographs.

 This one show the true colors.


 Reflections are another one of my issues as you can see here.


 Everything in the overhead cabinets was pulled from places around the house.  I expect much of this display to change.

When I find the right paper, I will line the back of the cabinets.


Another little detail is the graffiti on the island drawers.

 And a not so little detail is the medallion over the stove.

I have to give Dan the credit for spotting this on Craig's list and installing it so perfectly that it becomes a part of the tile work.

This post touches on the obvious details, but there are thousands more that went into this remodel.   This is my 26th post about this project and even with that, I have not noted every detail that I debated, agonized over, submitted to, or rejoiced over the past six months.

The final post on this topic will be published soon. The before and after pictures will be posted together and I will move on to...??..not another room remodel any time soon, but there is a project on the horizon.

Comments

Popular posts from this blog

On The Upswing

After the last post, it seemed a good idea to do a follow up post to report that things are moving along nicely. This shot was taken before the remodel started.  The door at the end of the hallway leads into the bath now being remodeled. This is where the changes started.  The trim is off the doorway and the door opening will be enlarged to the width of the hallway. This shot taken of that same area now looks like this.  By closing the entrance from the hallway, that bathroom will now be the master bath by keeping the entrance from the bedroom only. This is how it looks from the bathroom side.  the door on the left leads to the hallway and the one on the right into the bedroom. Now it looks like this.  Part of the hallway has become part of the bathroom.  This is where the vanity will be installed.  The partial doorway you see on the right leads to the bedroom. Turning 180 degrees and looking across the room to the opposite corner, you see the window and the en

Out of No Where

Isn't it uncanny how a project can sneak into an already crowded schedule? Recently a friend invited me to do a walk through on a two-family he was planning to buy.  A couple pieces of furniture had been left behind and they were dumpster material to him.  Did I go with him thinking there was something there for me?   NO. Was I looking for something in particular? NO.  Did the thought of finding a new project ever cross my mind? NO!  But, see for yourself.  Could you have passed this up?  It was sturdy (translates to a little heavy). There was nothing wrong with it.  It even had all the shelves and the pins that hold them in place.  And without the shelves it was not quite as heavy.  (Try telling me that as my friend and I are hauling it down a flight of stairs.)  More shelving on the side made it even more practical.  I'm sure they could be used for something besides VHS tapes. Here it is in my studio where I could do a complete assessment.  Looks like a good cleaning

Small Storage Containers RECYCLED

 With the way grocery products have skyrocketed this past year, it has somehow made the containers they come in seem more valuable. To be transparent, I have always saved glass jars from jam, pickles, and spaghetti sauce.=) You know, small, medium and large. I also saved yogurt cups, sour cream containers, etc. When I was painting furniture and mixing colors, the small containers came in handy. This past summer I got a good laugh when I found a stack of yogurt containers in the back of a cabinet in my studio...at least 60! Needless to say those made it into the trash. More recently I have collected a fair amount of plastic containers with lids that are similar to the food saving containers you buy for that purpose. These are fairly large, about 5x7 inches and approximately 3" deep. They are great for leftovers but also good for storing a multitude of other smallish items. The bottoms are see through which makes them perfect for organizing hobby/craft and workshop items. But once a