Even though monetary gifts might sound like the easy way out, that's not quite true. This year I'm calling it the safer way to gift. Safe because I don't have to risk shopping in a crowded store or picking something online that might not be quite what it looks like on my screen. My grandkids range in age from 8-27 (two girls and two boys.) Knowing exactly what they wish for at any given age is often a blind guess. Giving them money sort of feels like a cop-out, like maybe I didn't put enough effort into it. But this year it feels like just the thing to do.
I started by looking for ideas on Pinterest and saw a five-pointed star made from bills. It was for sale on Etsy so there were were no directions. However, I found those easily on youtube.
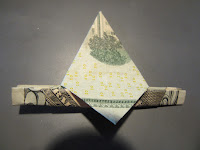
I decided on two stars for each grandchild so that meant I would need 40 bills to complete the project. A trip to the bank drive through took care of that. Here is where I messed up by forgetting to take any pictures of the process. So, for my purposes here I folded one bill (1/5 of one star) to show you how it looks.
This photo shows how the front of each bill looks when finished. The tabs will not show when all five bills are connected to form the star.
The photo below will be what you see on the backside of the star.
The dark green blob you see near the tip in the first photo is not what you see on my completed stars because I used a $5 bill on my completed stars and a $20 bill here. (Not that it matters a lot which denomination you choose but you should be consistent on each group of five bills.
The folding I spaced out over a few days. Nimble fingers could easily complete it in one sitting, but it also takes precision and, although it is 2020, that does not apply to my vision. So I paced myself to days of bright sunshine and flexible fingers.
Once all eight stars were folded and assembled they look like this:
Notice how you get a consistent pattern on each point of the star. You may have also noticed that someone wrote some initials on the bottom bill. Just another thing you need to be aware of when choosing bills to be folded.
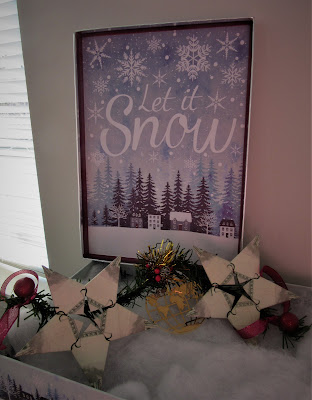
Next I gathered a few small items to "accessorize" the stars. I had a piece of, what could be called, a miniature garland. Actually is was a string of greenery from an artificial tree that would normally be used to wrap the stem of the tree to hide a possible bare spot. I cut that into four equal lengths and wired two stars to each strand. Yes, a dab of hot glue would have been easier and faster but these are currency that needs to be unfolded before using. I didn't want to cause any problems in that department.
I used small decorated boxes rather than wrapping paper on plain boxes. Instead of the standard tissue paper cushion, I used batting that I stretched gently to get a filmy, cloud like effect. That served to get a little hold on the garland and keep the whole piece from flopping around in the box.
This one has a couple tiny ornaments with some tinsel and berries on the ends.
I added a bit of ribbon to keep the lid on and used a photo of my grandson, G, when he was much younger. You probably can't see it but he does have a little snowman on his sweater and we were viewing the Christmas display at the Botanical Gardens the day this was taken.
This one got a little jingle bell, some dainty red ribbon and some little red flowers.
I also used a sepia tinted photo of my other grandson. Since they are brothers I tried to keep things similar.
This is N in the photo, also from an earlier time. He is looking at a Christmas card while standing in front of the stockings hung on the fireplace.
Some berries and a top hat finished off this one for one of my granddaughters.
A little curly ribbon secured this cover to the box. I will attach a name tag to this one too. Just haven't quite decided what to use on such a cute and colorful design.
This one has a little gold filigree ornament in the center and a thin ribbon with some berries here and there.
I added a little cutout snowflake with a sparkly center to the cover and secured it with iridescent silver ribbon.
Full disclosure: 2020 is not the first time I have gifted money to my grandkids but I have found that, as long as I present it in something other than an envelope, they are delighted. I suspect an envelope would work well for them too, but I'm all about the presentation of everything be it food, table settings, decor, or even my garage sales.


Beautiful!
ReplyDelete